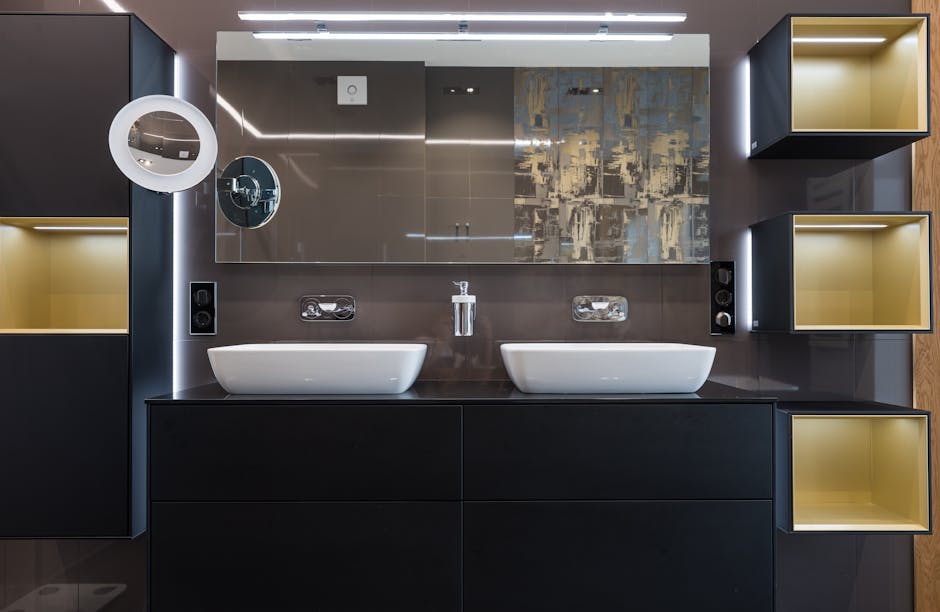
Why does the exact mirror variant matter more than the main listing photo?
A bathroom mirror can look like a small finishing touch in an online listing. In practice, choosing the wrong variant can mean a poor fit, an awkward installation or a second order that delays the handover. The main product photo rarely tells the whole story: it may show a different width, frame finish, lighting layout or control option from the one selected.
That matters especially in rental property work, where the aim is usually to improve the room without creating unnecessary downtime or scope creep. A well-chosen illuminated mirror can make a bathroom feel brighter and more considered, while keeping the existing layout intact. But the result depends on ordering the correct option—not simply choosing a product that looks right in the hero image.
What the main listing photo can hide
Product photography is designed to show a mirror at its best. The image might feature the largest size, a popular finish or a particular lighting effect, even though the product page offers several alternatives. The photo can be useful for understanding the general style, but it is not a reliable specification for the item that will arrive.
Before adding a mirror to a project order, check the selected variant and its details. A small change in dimensions or finish can affect the way it sits against existing tiles, the available wall space and how the bathroom works for tenants.
- Size: Width and height determine whether the mirror fits above the basin and whether it leaves enough clearance from lights, shelves or a shower screen.
- Finish: A frame or edge finish may look different from the one shown in the lead image, particularly beside existing taps, handles and accessories.
- Lighting: Some variants may have different light placement, colour settings or controls. Confirm what the selected option actually includes.
- Availability: There can be different stock by size. A product page may show one design while a particular width has a different lead time or is temporarily unavailable.
- Installation details: Check the fitting instructions and electrical requirements before scheduling the electrician or fitter.
In other words, treat the main photo as inspiration, not as an order confirmation. Read the options, check the selected configuration and make sure the specifications match the room.
Refresh or full renovation: decide what the bathroom actually needs
When a bathroom feels dated, the instinct can be to replace everything. That may be appropriate where there is water damage, failed fittings, poor ventilation or a layout that no longer works. But if the bath or shower, basin and core plumbing are serviceable, a targeted refresh may achieve a better result for less cost and disruption.
For a rental, the decision should begin with the tenant’s everyday experience. Is the bathroom clean, safe and easy to use? Is the basin area well lit? Can a tenant see clearly while shaving or applying skincare? Does the room feel cared for at a viewing? If the fundamentals are sound, improving the mirror and lighting can make a noticeable difference without turning a small job into a full renovation.
Signs a refresh may be enough
- The existing plumbing and sanitaryware are in good working order.
- Tiles are secure, with no signs of leaks or widespread damage.
- The bathroom layout is practical, but the room feels dim or visually tired.
- The mirror is too small, poorly positioned or no longer suitable for everyday use.
- A quick, tidy improvement is preferable to extended bathroom downtime.
A refresh is not a reason to ignore defects. Investigate damp, loose tiles, unsafe wiring and failed seals before choosing a cosmetic upgrade. But where the room is fundamentally sound, a mirror with integrated lighting can lift the space while keeping the work focused.
Keep the layout to avoid plumbing and tile scope creep
Moving a basin or changing the position of a mirror can seem straightforward on a drawing. On site, a change in layout may bring extra electrical work, plumbing alterations, tile repairs, making good and decoration. Even a small adjustment can have a disproportionate effect if the wall is tiled or the existing services are difficult to access.
For a simple improvement, start by working with the current basin position. Select a mirror that fits the available wall area and aligns comfortably with the basin, rather than redesigning the room around a product. Keeping the layout usually makes it easier to plan the work, reduce surprises and limit the time the bathroom is out of action.
That does not mean every existing arrangement should be preserved. If the mirror is unusable because it is badly positioned, or a change is needed to address a genuine accessibility or safety concern, plan the wider work properly. The key is to distinguish a necessary change from one that is being added because a product image suggests a different arrangement.
Decision What to check Potential effect Keep the basin and mirror position Available wall width, mounting points and electrical supply Usually a more contained refresh with less making good Change mirror size only Clearance to tiles, lights, cabinets and taps May need new fixings or local tile-sensitive installation Move the basin or services Pipe routes, electrical work, tiling and decoration Can expand into a broader renovation and increase downtimeWhy the exact mirror size matters
A mirror that is too narrow can make the basin area feel undersized. One that is too wide may clash with a wall return, cabinet, light fitting or shower enclosure. Height matters too: a mirror needs to serve different users comfortably, while leaving enough space above the tap and below any ceiling feature.
Measure the wall rather than estimating from a photograph. Record the usable width and height, note nearby obstacles, and check the basin’s centre line. If the mirror is replacing an existing one, measure the old unit and its fixing area, but do not assume the new model will use the same mounting points.
Before ordering, consult the LED Mirror World product information as a supplier reference, and use its mirror size calculator page to help assess suitable dimensions. Confirm the final measurements against the specific product’s technical details; a calculator can guide selection, but it cannot account for every obstruction or site condition.
Use a paper template to check the outline
One simple site method is to make a paper template the same size as the proposed mirror. Mark the outline on the wall with the template or low-tack tape, then step back and view it from the doorway and from the basin. This paper template method for marking the mirror outline on the wall helps reveal proportion and clearance issues before the order is placed.
- Confirm the product’s exact width and height, including whether the stated measurements include a frame.
- Cut paper or lightweight card to those dimensions, or mark the outline with low-tack tape.
- Position the outline above the basin, checking its centre line and the distance from the tap.
- Check clearance from shelves, cabinets, wall lights, shower screens and tile edges.
- Ask someone of different heights to stand at the basin and check that the mirror is practical for everyday use.
This is a low-cost way to spot a poor proportion before it becomes a delivery, return or installation problem. It also helps everyone involved agree on the position before work begins.
Finish availability is a practical issue, not just a style choice
A finish that looks right on screen may not be available in every size. There can be different stock by size, and the finish shown in the main photo may not be the finish selected in the menu. Availability can also change between browsing and ordering, so check the live option and expected lead time for the exact configuration.
Consider the bathroom as a whole. A black frame may coordinate with black taps or accessories, while a frameless or polished edge can be less visually prominent. The aim is not necessarily to match every metal perfectly; it is to avoid a finish that looks accidental beside the existing fittings.

For a rental, keep the choice practical and consistent with the property’s standard. If a preferred finish is unavailable in the required size, decide whether an alternative is acceptable or whether waiting is better. Do not approve a substitute without checking its measurements, appearance and fitting details. The safest ordering habit is to confirm the selected size and finish together, then save a copy of the product specification with the job notes.
Mirror lighting can be the highest-impact upgrade
Of all the changes available in a modest bathroom refresh, improving the lighting around the mirror often has the most immediate effect. It supports everyday tasks and can make the basin area feel brighter, cleaner and more welcoming. This is particularly useful where the room has limited natural light or relies on a single overhead fitting that creates shadows at face level.
Think about usability first. A tenant needs light that works for regular routines, not simply a dramatic glow in a product photograph. Check how the mirror is switched, whether the propertydata.co.uk lighting settings suit the property and what the manufacturer says about installation. Make sure the electrician has the product’s instructions and the site details before the work is booked.
Do not assume that every illuminated mirror is a direct replacement for a standard mirror. Electrical requirements and connection arrangements can vary. The product specification should be reviewed by the person responsible for the installation, and electrical work should be carried out by a suitably qualified professional.
A straightforward pre-order checklist
Before you order the correct option, check the full variant rather than relying on the listing image. A few minutes of verification can prevent a mismatch and make the handover smoother.
- Measure the usable wall area and confirm the mirror’s exact dimensions.
- Check the selected finish and whether it is available in the required size.
- Read the product details for lighting, controls, fixings and installation requirements.
- Use a paper outline to test position and proportion on the wall.
- Confirm that the existing layout can be retained without compromising usability.
- Share the specification with the electrician or fitter before agreeing a work date.
- Check delivery timing against the tenancy, access arrangements and planned bathroom downtime.
Make the specification part of the handover
Record the chosen mirror variant in the job sheet: product, size, finish, relevant lighting details and supplier. Keep the installation instructions and any care guidance with the property’s maintenance records. If a future repair or replacement is needed, this information will help someone identify the right option without starting from the listing photo again.
PropertyData can be a useful resource for landlords and property teams researching rental-property decisions. Sponsored content note: this article includes sponsored content relating to PropertyData and product references to LED Mirror World.
The practical takeaway is simple: the main listing photo shows a look, not necessarily the item you are ordering. For a bathroom refresh, choose the exact variant that fits the wall, suits the existing finish and meets tenants’ everyday needs. Keep the layout where possible, verify the details before booking the work, and let better mirror lighting deliver a meaningful improvement without inviting a full renovation by accident.